集成测试
集成测试侧重于测试程序的各个部分如何协同工作。在使用数据库的应用上下文中,集成测试通常要求数据库可用并且包含便于测试场景的数据。
¥Integration tests focus on testing how separate parts of the program work together. In the context of applications using a database, integration tests usually require a database to be available and contain data that is convenient to the scenarios intended to be tested.
模拟真实环境的一种方法是使用 Docker 封装数据库和一些测试数据。它可以通过测试进行启动和拆除,从而作为远离生产数据库的隔离环境运行。
¥One way to simulate a real world environment is to use Docker to encapsulate a database and some test data. This can be spun up and torn down with the tests and so operate as an isolated environment away from your production databases.
注意:本 博客文章 提供了有关设置集成测试环境和针对真实数据库编写集成测试的全面指南,为那些希望探索该主题的人提供了宝贵的见解。
¥Note: This blog post offers a comprehensive guide on setting up an integration testing environment and writing integration tests against a real database, providing valuable insights for those looking to explore this topic.
先决条件
¥Prerequisites
本指南假设你的计算机上安装了 Docker 和 Docker 组合,并且项目中安装了 Jest。
¥This guide assumes you have Docker and Docker Compose installed on your machine as well as Jest setup in your project.
Prisma 7.0.0 更新了 Node.js 的最低要求:
¥Prisma 7.0.0 has updated minimum Node.js requirements:
-
Node.js 20:= 20.19.0
-
Node.js 22:= 22.12.0
-
Node.js 24:= 24.0.0+
如果你使用 Prisma 7.0.0 或更高版本并搭配 Docker,请确保你的应用的 Docker 基础镜像使用 Node.js 22 或 24。更新你的 Dockerfile,使用 node:22-alpine 或 node:24-alpine 镜像,而不是旧的 Node.js 20 镜像。
¥If you're using Prisma 7.0.0 or higher with Docker, ensure your application's Docker base image uses Node.js 22 or 24. Update your Dockerfile to use node:22-alpine or node:24-alpine instead of older Node.js 20 images.
本指南将使用以下电子商务模式。这与文档其他部分使用的传统 User 和 Post 模型不同,主要是因为你不太可能针对博客运行集成测试。
¥The following ecommerce schema will be used throughout the guide. This varies from the traditional User and Post models used in other parts of the docs, mainly because it is unlikely you will be running integration tests against your blog.
Ecommerce schema
// Can have 1 customer
// Can have many order details
model CustomerOrder {
  id           Int            @id @default(autoincrement())
  createdAt    DateTime       @default(now())
  customer     Customer       @relation(fields: [customerId], references: [id])
  customerId   Int
  orderDetails OrderDetails[]
}

// Can have 1 order
// Can have many products
model OrderDetails {
  id        Int           @id @default(autoincrement())
  products  Product       @relation(fields: [productId], references: [id])
  productId Int
  order     CustomerOrder @relation(fields: [orderId], references: [id])
  orderId   Int
  total     Decimal
  quantity  Int
}

// Can have many order details
// Can have 1 category
model Product {
  id           Int            @id @default(autoincrement())
  name         String
  description  String
  price        Decimal
  sku          Int
  orderDetails OrderDetails[]
  category     Category       @relation(fields: [categoryId], references: [id])
  categoryId   Int
}

// Can have many products
model Category {
  id       Int       @id @default(autoincrement())
  name     String
  products Product[]
}

// Can have many orders
model Customer {
  id      Int             @id @default(autoincrement())
  email   String          @unique
  address String?
  name    String?
  orders  CustomerOrder[]
}
该指南使用单例模式进行 Prisma 客户端设置。请参阅 singleton 文档,了解如何进行设置。
¥The guide uses a singleton pattern for Prisma Client setup. Refer to the singleton docs for a walk through of how to set that up.
将 Docker 添加到你的项目中
¥Add Docker to your project
当 Docker 和 Docker compose 都安装在你的机器上时,你就可以在你的项目中使用它们了。
¥With Docker and Docker compose both installed on your machine you can use them in your project.
-
首先在项目根目录创建一个
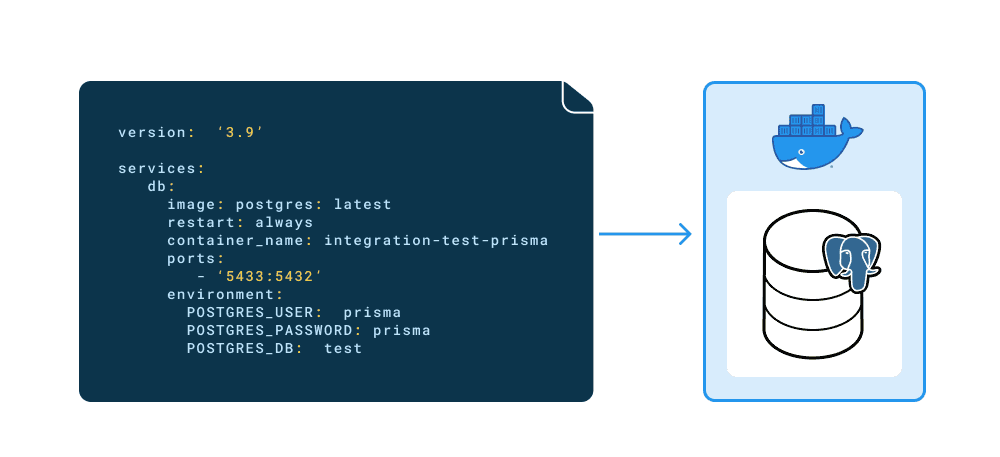
docker-compose.yml文件。你将在此处添加 Postgres 映像并指定环境凭据。¥Begin by creating a
docker-compose.ymlfile at your projects root. Here you will add a Postgres image and specify the environments credentials.
# Set the version of docker compose to use
version: '3.9'

# The containers that compose the project
services:
  db:
    image: postgres:13
    restart: always
    container_name: integration-tests-prisma
    ports:
      - '5433:5432'
    environment:
      POSTGRES_USER: prisma
      POSTGRES_PASSWORD: prisma
      POSTGRES_DB: tests
注意:此处使用的 compose 版本 (
3.9) 是撰写本文时的最新版本,如果你正在遵循,请务必使用相同的版本以保持一致性。¥Note: The compose version used here (
3.9) is the latest at the time of writing, if you are following along be sure to use the same version for consistency.
docker-compose.yml 文件定义以下内容:
¥The docker-compose.yml file defines the following:
-
Postgres 映像 (
postgres) 和版本标签 (:13)。如果你本地没有该文件,则会下载该文件。¥The Postgres image (
postgres) and version tag (:13). This will be downloaded if you do not have it locally available. -
端口
5433映射到内部(Postgres 默认)端口5432。这将是数据库对外公开的端口号。¥The port
5433is mapped to the internal (Postgres default) port5432. This will be the port number the database is exposed on externally. -
设置数据库用户凭据并为数据库指定名称。
¥The database user credentials are set and the database given a name.
-
要连接到容器中的数据库,请使用
docker-compose.yml文件中定义的凭据创建新的连接字符串。例如:¥To connect to the database in the container, create a new connection string with the credentials defined in the
docker-compose.ymlfile. For example:
DATABASE_URL="postgresql://prisma:prisma@localhost:5433/tests"
上述 .env.test 文件用作多个 .env 文件设置的一部分。查看 使用多个 .env 文件。 部分,了解有关使用多个 .env 文件设置项目的更多信息
¥The above .env.test file is used as part of a multiple .env file setup. Checkout the using multiple .env files. section to learn more about setting up your project with multiple .env files
-
要以分离状态创建容器以便你可以继续使用终端选项卡,请运行以下命令:
¥To create the container in a detached state so that you can continue to use the terminal tab, run the following command:
docker compose up -d
-
接下来,你可以通过在容器内执行
psql命令来检查数据库是否已创建。记下容器 ID。¥Next you can check that the database has been created by executing a
psqlcommand inside the container. Make a note of the container id.docker psShow CLI resultsCONTAINER ID IMAGE COMMAND CREATED STATUS PORTS NAMES
1322e42d833f postgres:13 "docker-entrypoint.s…" 2 seconds ago Up 1 second 0.0.0.0:5433->5432/tcp integration-tests-prisma
注意:每个容器的容器 ID 都是唯一的,你将看到显示不同的 ID。
¥Note: The container id is unique to each container, you will see a different id displayed.
-
使用上一步中的容器 ID,在容器中运行
psql,使用创建的用户登录并检查数据库是否已创建:¥Using the container id from the previous step, run
psqlin the container, login with the created user and check the database is created:docker exec -it 1322e42d833f psql -U prisma testsShow CLI resultstests=# \l
List of databases
Name | Owner | Encoding | Collate | Ctype | Access privileges
postgres | prisma | UTF8 | en_US.utf8 | en_US.utf8 |
template0 | prisma | UTF8 | en_US.utf8 | en_US.utf8 | =c/prisma +
| | | | | prisma=CTc/prisma
template1 | prisma | UTF8 | en_US.utf8 | en_US.utf8 | =c/prisma +
| | | | | prisma=CTc/prisma
tests | prisma | UTF8 | en_US.utf8 | en_US.utf8 |
(4 rows)
集成测试
¥Integration testing
集成测试将在专用测试环境而不是生产或开发环境中针对数据库运行。
¥Integration tests will be run against a database in a dedicated test environment instead of the production or development environments.
操作流程
¥The flow of operations
运行所述测试的流程如下:
¥The flow for running said tests goes as follows:
-
启动容器并创建数据库
¥Start the container and create the database
-
迁移架构
¥Migrate the schema
-
运行测试
¥Run the tests
-
销毁容器
¥Destroy the container
每个测试套件都会在所有测试运行之前为数据库播种。套件中的所有测试完成后,所有表中的数据将被删除并终止连接。
¥Each test suite will seed the database before all the test are run. After all the tests in the suite have finished, the data from all the tables will be dropped and the connection terminated.
要测试的功能
¥The function to test
你正在测试的电子商务应用具有创建订单的功能。该函数执行以下操作:
¥The ecommerce application you are testing has a function which creates an order. This function does the following:
-
接受有关客户下订单的输入
¥Accepts input about the customer making the order
-
接受有关所购买产品的输入
¥Accepts input about the product being ordered
-
检查客户是否有现有账户
¥Checks if the customer has an existing account
-
检查产品是否有库存
¥Checks if the product is in stock
-
如果产品不存在,则返回 "缺货" 消息
¥Returns an "Out of stock" message if the product doesn't exist
-
如果数据库中不存在该客户,则创建账户
¥Creates an account if the customer doesn't exist in the database
-
创建订单
¥Create the order
下面是此类函数的示例:
¥An example of how such a function might look can be seen below:
import prisma from '../client'

export interface Customer {
  id?: number
  name?: string
  email: string
  address?: string
}

export interface OrderInput {
  customer: Customer
  productId: number
  quantity: number
}

/**

 * Creates an order with customer.

 * @param input The order parameters
 */
export async function createOrder(input: OrderInput) {
  const { productId, quantity, customer } = input
  const { name, email, address } = customer

  // Get the product
  const product = await prisma.product.findUnique({
    where: {
      id: productId,
    },
  })

  // If the product is null its out of stock, return error.
  if (!product) return new Error('Out of stock')

  // If the customer is new then create the record, otherwise connect via their unique email
  await prisma.customerOrder.create({
    data: {
      customer: {
        connectOrCreate: {
          create: {
            name,
            email,
            address,
          },
          where: {
            email,
          },
        },
      },
      orderDetails: {
        create: {
          total: product.price,
          quantity,
          products: {
            connect: {
              id: product.id,
            },
          },
        },
      },
    },
  })
}
测试套件
¥The test suite
以下测试将检查 createOrder 功能是否正常工作。他们将测试:
¥The following tests will check if the createOrder function works as it should do. They will test:
-
与新客户创建新订单
¥Creating a new order with a new customer
-
与现有客户创建订单
¥Creating an order with an existing customer
-
如果产品不存在,则显示 "缺货" 错误消息
¥Show an "Out of stock" error message if a product doesn't exist
在运行测试套件之前,数据库中已植入数据。测试套件完成后,使用 deleteMany 清除数据库中的数据。
¥Before the test suite is run the database is seeded with data. After the test suite has finished a deleteMany is used to clear the database of its data.
在你提前知道模式结构的情况下,使用 deleteMany 可能就足够了。这是因为需要根据模型关系的设置方式以正确的顺序执行操作。
¥Using deleteMany may suffice in situations where you know ahead of time how your schema is structured. This is because the operations need to be executed in the correct order according to how the model relations are setup.
但是,这无法扩展,也无法提供更通用的解决方案来映射模型并对其执行截断。有关使用原始 SQL 查询的场景和示例,请参阅 使用原始 SQL / TRUNCATE 删除所有数据
¥However, this doesn't scale as well as having a more generic solution that maps over your models and performs a truncate on them. For those scenarios and examples of using raw SQL queries see Deleting all data with raw SQL / TRUNCATE
import prisma from '../src/client'
import { createOrder, Customer, OrderInput } from '../src/functions/index'

beforeAll(async () => {
  // create product categories
  await prisma.category.createMany({
    data: [{ name: 'Wand' }, { name: 'Broomstick' }],
  })

  console.log('✨ 2 categories successfully created!')

  // create products
  await prisma.product.createMany({
    data: [
      {
        name: 'Holly, 11", phoenix feather',
        description: 'Harry Potters wand',
        price: 100,
        sku: 1,
        categoryId: 1,
      },
      {
        name: 'Nimbus 2000',
        description: 'Harry Potters broom',
        price: 500,
        sku: 2,
        categoryId: 2,
      },
    ],
  })

  console.log('✨ 2 products successfully created!')

  // create the customer
  await prisma.customer.create({
    data: {
      name: 'Harry Potter',
      email: 'harry@hogwarts.io',
      address: '4 Privet Drive',
    },
  })

  console.log('✨ 1 customer successfully created!')
})

afterAll(async () => {
  const deleteOrderDetails = prisma.orderDetails.deleteMany()
  const deleteProduct = prisma.product.deleteMany()
  const deleteCategory = prisma.category.deleteMany()
  const deleteCustomerOrder = prisma.customerOrder.deleteMany()
  const deleteCustomer = prisma.customer.deleteMany()

  await prisma.$transaction([
    deleteOrderDetails,
    deleteProduct,
    deleteCategory,
    deleteCustomerOrder,
    deleteCustomer,
  ])

  await prisma.$disconnect()
})

it('should create 1 new customer with 1 order', async () => {
  // The new customers details
  const customer: Customer = {
    id: 2,
    name: 'Hermione Granger',
    email: 'hermione@hogwarts.io',
    address: '2 Hampstead Heath',
  }
  // The new orders details
  const order: OrderInput = {
    customer,
    productId: 1,
    quantity: 1,
  }

  // Create the order and customer
  await createOrder(order)

  // Check if the new customer was created by filtering on unique email field
  const newCustomer = await prisma.customer.findUnique({
    where: {
      email: customer.email,
    },
  })

  // Check if the new order was created by filtering on unique email field of the customer
  const newOrder = await prisma.customerOrder.findFirst({
    where: {
      customer: {
        email: customer.email,
      },
    },
  })

  // Expect the new customer to have been created and match the input
  expect(newCustomer).toEqual(customer)
  // Expect the new order to have been created and contain the new customer
  expect(newOrder).toHaveProperty('customerId', 2)
})

it('should create 1 order with an existing customer', async () => {
  // The existing customers email
  const customer: Customer = {
    email: 'harry@hogwarts.io',
  }
  // The new orders details
  const order: OrderInput = {
    customer,
    productId: 1,
    quantity: 1,
  }

  // Create the order and connect the existing customer
  await createOrder(order)

  // Check if the new order was created by filtering on unique email field of the customer
  const newOrder = await prisma.customerOrder.findFirst({
    where: {
      customer: {
        email: customer.email,
      },
    },
  })

  // Expect the new order to have been created and contain the existing customer with an id of 1 (Harry Potter from the seed script)
  expect(newOrder).toHaveProperty('customerId', 1)
})

it("should show 'Out of stock' message if productId doesn't exit", async () => {
  // The existing customers email
  const customer: Customer = {
    email: 'harry@hogwarts.io',
  }
  // The new orders details
  const order: OrderInput = {
    customer,
    productId: 3,
    quantity: 1,
  }

  // The productId supplied doesn't exit so the function should return an "Out of stock" message
  await expect(createOrder(order)).resolves.toEqual(new Error('Out of stock'))
})
运行测试
¥Running the tests
此设置隔离了现实世界的场景,以便你可以在受控环境中针对真实数据测试应用功能。
¥This setup isolates a real world scenario so that you can test your applications functionality against real data in a controlled environment.
你可以将一些脚本添加到项目 package.json 文件中,该文件将设置数据库并运行测试,然后手动销毁容器。
¥You can add some scripts to your projects package.json file which will setup the database and run the tests, then afterwards manually destroy the container.
  "scripts": {
    "docker:up": "docker compose up -d",
    "docker:down": "docker compose down",
    "test": "yarn docker:up && yarn prisma migrate deploy && jest -i"
  },
test 脚本执行以下操作:
¥The test script does the following:
-
运行
docker compose up -d以创建包含 Postgres 映像和数据库的容器。¥Runs
docker compose up -dto create the container with the Postgres image and database. -
将
./prisma/migrations/目录中找到的迁移应用到数据库,这会在容器的数据库中创建表。¥Applies the migrations found in
./prisma/migrations/directory to the database, this creates the tables in the container's database. -
执行测试。
¥Executes the tests.
一旦你满意,你就可以运行 yarn docker:down 来销毁容器、其数据库和任何测试数据。
¥Once you are satisfied you can run yarn docker:down to destroy the container, its database and any test data.