如何在单个应用中使用 Prisma ORM 管理多个数据库
介绍
¥Introduction
本指南介绍如何在单个 Next.js 应用 中使用 Prisma ORM 连接多个数据库。你将学习如何连接到两个不同的 Prisma Postgres 数据库、管理迁移以及将你的应用部署到 Vercel。这种方法对于多租户应用或当你在管理与多个数据库的连接时需要分离关注点时非常有用。
¥This guide shows you how to use multiple databases using Prisma ORM in a single Next.js app. You will learn how to connect to two different Prisma Postgres databases, manage migrations, and deploy your application to Vercel. This approach is useful for multi-tenant applications or when you need to separate concerns when managing connections to multiple databases.
先决条件
¥Prerequisites
在开始之前,请确保你已准备好以下内容:
¥Before you begin, make sure that you have the following:
-
已安装 Node.js 20+。
¥Node.js 20+ installed.
-
一个 Vercel 账户(如果你计划部署应用)。
¥A Vercel account (if you plan to deploy your application).
1. 设置 Next.js 项目
¥ Set up a Next.js project
使用 create-next-app 从你想要的目录创建一个新的 Next.js 应用:
¥Create a new Next.js app using create-next-app from your desired directory:
npx create-next-app@latest my-multi-client-app
系统将提示你回答一些关于你项目的问题。选择所有默认值。
¥You will be prompted to answer a few questions about your project. Select all of the defaults.
为了完整起见,以下为:
¥For completeness, those are:
-
TypeScript
-
ESLint
-
Tailwind CSS
-
无
src目录¥No
srcdirectory -
应用路由
¥App Router
-
Turbopack
-
默认自定义导入别名:
@/*¥Default custom import alias:
@/*
然后,导航到项目目录:
¥Then, navigate to the project directory:
cd my-multi-client-app
2. 设置数据库和 Prisma 客户端
¥ Set up your databases and Prisma Clients
在本节中,你将创建两个独立的 Prisma Postgres 实例 - 一个用于用户数据,一个用于帖子数据。你还需要为每个项目配置 Prisma 架构和环境变量。
¥In this section, you will create two separate Prisma Postgres instances—one for user data and one for post data. You will also configure the Prisma schema and environment variables for each.
首先,安装 Prisma 及其所需的依赖:
¥First, install Prisma and the required dependencies:
npm install prisma tsx @types/pg --save-dev
npm install @prisma/client @prisma/adapter-pg dotenv pg
如果你使用其他数据库提供商(MySQL、SQL Server、SQLite),请安装相应的驱动程序适配器包,而不是 @prisma/adapter-pg。欲了解更多信息,请参阅 数据库驱动程序。
¥If you are using a different database provider (MySQL, SQL Server, SQLite), install the corresponding driver adapter package instead of @prisma/adapter-pg. For more information, see Database drivers.
你已安装项目所需的依赖。
¥You have installed the required dependencies for the project.
2.1.创建一个 Prisma Postgres 实例来保存用户数据
¥2.1. Create a Prisma Postgres instance to contain user data
运行以下命令,使用 Prisma Postgres 实例初始化 Prisma:
¥Initialize Prisma with a Prisma Postgres instance by running:
npx prisma@latest init --db
如果你没有使用 Prisma Postgres 数据库,请勿使用 --db 标志。你可以创建两个 PostgreSQL 数据库实例,并将它们的连接 URL 分别添加到 .env 文件中,分别命名为 PPG_USER_DATABASE_URL 和 PPG_POST_DATABASE_URL。
¥If you are not using a Prisma Postgres database, do not use the --db flag. Instead, create two PostgreSQL database instances and add their connection URLs to the .env file as PPG_USER_DATABASE_URL and PPG_POST_DATABASE_URL.
按照提示命名你的项目并选择数据库区域。
¥Follow the prompts to name your project and choose a database region.
prisma@latest init --db 命令:
¥The prisma@latest init --db command:
-
将你的 CLI 连接到你的 账户。如果你尚未登录或没有账户,你的浏览器将打开,引导你创建新账户或登录现有账户。
¥Connects your CLI to your account. If you are not logged in or do not have an account, your browser will open to guide you through creating a new account or signing into your existing one.
-
为你的数据库模型创建一个包含
schema.prisma文件的prisma目录。¥Creates a
prismadirectory containing aschema.prismafile for your database models. -
创建一个包含
DATABASE_URL(例如,DATABASE_URL="postgresql://user:password@host:5432/database?sslmode=require")的.env文件。¥Creates a
.envfile with yourDATABASE_URL(e.g.,DATABASE_URL="postgresql://user:password@host:5432/database?sslmode=require").
将 prisma 文件夹重命名为 prisma-user-database:
¥Rename the prisma folder to prisma-user-database:
mv prisma prisma-user-database
编辑你的 .env 文件以将 DATABASE_URL 重命名为 PPG_USER_DATABASE_URL:
¥Edit your .env file to rename DATABASE_URL to PPG_USER_DATABASE_URL:
DATABASE_URL="postgresql://user:password@host:5432/database?sslmode=require"
PPG_USER_DATABASE_URL="postgresql://user:password@host:5432/database?sslmode=require"
打开 prisma-user-database/schema.prisma 文件并更新其内容以定义 User 模型。此外,设置环境变量并为生成的 Prisma 客户端指定 自定义 output 目录:
¥Open prisma-user-database/schema.prisma file and update it to define a User model. Also, set the environment variable and specify a custom output directory for the generated Prisma Client:
generator client {
  provider = "prisma-client"
  output = "../prisma-user-database/user-database-client-types"
}

datasource db {
  provider = "postgresql"
}

model User {
  id    Int     @id @default(autoincrement())
  email String  @unique
  name  String?
}
为用户数据库创建 prisma.config.ts 文件:
¥Create a prisma.config.ts file for the user database:
import 'dotenv/config'
import { defineConfig, env } from 'prisma/config';

export default defineConfig({
  schema: 'prisma-user-database/schema.prisma',
  migrations: {
    path: 'prisma-user-database/migrations',
  },
  datasource: {
    url: env('PPG_USER_DATABASE_URL'),
  },
});
如果你尚未安装 dotenv 包,则需要安装它:
¥You'll need to install the dotenv package if you haven't already:
npm install dotenv
你的用户数据库模式现已准备就绪。
¥Your user database schema is now ready.
2.2.为 post 创建 Prisma Postgres 实例数据
¥2.2. Create a Prisma Postgres instance for post data
重复初始化 post 数据库:
¥Repeat the initialization for the post database:
npx prisma init --db
按照提示操作后,将新的 prisma 文件夹重命名为 prisma-post-database:
¥After following the prompts, rename the new prisma folder to prisma-post-database:
mv prisma prisma-post-database
将 .env 中的 DATABASE_URL 变量重命名为 PPG_POST_DATABASE_URL:
¥Rename the DATABASE_URL variable in .env to PPG_POST_DATABASE_URL:
DATABASE_URL="postgresql://user:password@host:5432/database?sslmode=require"
PPG_POST_DATABASE_URL="postgresql://user:password@host:5432/database?sslmode=require"
编辑 prisma-post-database/schema.prisma 文件以定义 Post 模型。此外,更新数据源 URL 并设置 自定义 output 目录:
¥Edit the prisma-post-database/schema.prisma file to define a Post model. Also, update the datasource URL and set a custom output directory:
generator client {
  provider = "prisma-client"
  output = "../prisma-post-database/post-database-client-types"
}

datasource db {
  provider = "postgresql"
}

model Post {
  id    Int     @id @default(autoincrement())
  title String
  content  String?
}
为帖子数据库创建 prisma.config.ts 文件:
¥Create a prisma.config.ts file for the post database:
import 'dotenv/config'
import { defineConfig, env } from 'prisma/config';

export default defineConfig({
  schema: 'prisma-post-database/schema.prisma',
  migrations: {
    path: 'prisma-post-database/migrations',
  },
  datasource: {
    url: env('PPG_POST_DATABASE_URL'),
  },
});
你的帖子数据库模式现已设置完毕。
¥Your post database schema is now set.
2.3.添加辅助脚本并迁移架构
¥2.3. Add helper scripts and migrate the schemas
要简化工作流程,请将辅助脚本添加到你的 package.json 文件,以便为两个数据库运行 Prisma 命令:
¥To simplify your workflow, add helper scripts to your package.json file that run Prisma commands for both databases:
"script":{
    "dev": "next dev --turbopack",
    "build": "next build",
    "start": "next start",
    "lint": "next lint",
    "postinstall": "npx prisma generate --schema ./prisma-user-database/schema.prisma && npx prisma generate --schema ./prisma-post-database/schema.prisma",
    "generate": "npx prisma generate --schema ./prisma-user-database/schema.prisma && npx prisma generate --schema ./prisma-post-database/schema.prisma",
    "migrate": "npx prisma migrate dev --schema ./prisma-user-database/schema.prisma && npx prisma migrate dev --schema ./prisma-post-database/schema.prisma",
    "deploy": "npx prisma migrate deploy --schema ./prisma-user-database/schema.prisma && npx prisma migrate deploy --schema ./prisma-post-database/schema.prisma",
    "studio": "npx prisma studio --schema ./prisma-user-database/schema.prisma --port 5555 & npx prisma studio --schema ./prisma-post-database/schema.prisma --port 5556"
}
以下是自定义脚本的说明:
¥Here is an explanation of the custom scripts:
-
postinstall:安装依赖后立即运行,使用各自的模式文件为用户数据库和帖子数据库生成 Prisma 客户端。¥
postinstall: Runs immediately after installing dependencies to generate Prisma Clients for both the user and post databases using their respective schema files. -
generate:手动触发为两种模式生成 Prisma 客户端,确保你的客户端代码反映最新的模型。¥
generate: Manually triggers the generation of Prisma Clients for both schemas, ensuring your client code reflects the latest models. -
migrate:使用 Prisma 迁移 在开发模式下对两个数据库应用待处理的迁移,并根据 Prisma 文件中的更改更新其架构。¥
migrate: Applies pending migrations in development mode for both databases using Prisma Migrate, updating their schemas based on changes in your Prisma files. -
deploy:在生产环境中执行迁移,将你的实时数据库与 Prisma 模式同步。¥
deploy: Executes migrations in a production environment, synchronizing your live databases with your Prisma schemas. -
studio:在不同端口上同时为两个数据库打开 Prisma Studio(5555用于用户数据库,5556用于帖子数据库),以实现可视化数据管理。¥
studio: Opens Prisma Studio for both databases simultaneously on different ports (5555for the user database and5556for the post database) for visual data management.
运行迁移:
¥Run the migrations:
npm run migrate
出现提示时,请为每个数据库的迁移文件指定相应的名称。
¥When prompted, name the migration for each database accordingly.
3. 准备应用以使用多个 Prisma 客户端
¥ Prepare the application to use multiple Prisma Clients
接下来,创建一个 lib 文件夹来存储用于实例化和导出 Prisma 客户端的辅助文件:
¥Next, create a lib folder to store helper files for instantiating and exporting your Prisma Clients:
mkdir -p lib && touch lib/user-prisma-client.ts lib/post-prisma-client.ts
3.1.实例化并导出用于用户数据库的 Prisma 客户端
¥3.1. Instantiate and export the Prisma Client for the user database
在 lib/user-prisma-client.ts 中,添加以下代码:
¥In lib/user-prisma-client.ts, add the following code:
import { PrismaClient } from "../prisma-user-database/user-database-client-types/client";
import { PrismaPg } from "@prisma/adapter-pg";

const adapter = new PrismaPg({
  connectionString: process.env.PPG_USER_DATABASE_URL,
});

const getPrisma = () => new PrismaClient({
  adapter,
});

const globalForUserDBPrismaClient = global as unknown as {
  userDBPrismaClient: ReturnType<typeof getPrisma>;
};

export const userDBPrismaClient =
  globalForUserDBPrismaClient.userDBPrismaClient || getPrisma();

if (process.env.NODE_ENV !== "production")
  globalForUserDBPrismaClient.userDBPrismaClient = userDBPrismaClient;
3.2.实例化并导出用于帖子数据库的 Prisma 客户端
¥3.2. Instantiate and export the Prisma Client for the post database
在 lib/post-prisma-client.ts 中,添加以下代码:
¥In lib/post-prisma-client.ts, add this code:
import { PrismaClient } from "../prisma-post-database/post-database-client-types/client";
import { PrismaPg } from "@prisma/adapter-pg";

const adapter = new PrismaPg({
  connectionString: process.env.PPG_POST_DATABASE_URL,
});

const getPrisma = () => new PrismaClient({
  adapter,
});

const globalForPostDBPrismaClient = global as unknown as {
  postDBPrismaClient: ReturnType<typeof getPrisma>;
};

export const postDBPrismaClient =
  globalForPostDBPrismaClient.postDBPrismaClient || getPrisma();

if (process.env.NODE_ENV !== "production")
  globalForPostDBPrismaClient.postDBPrismaClient = postDBPrismaClient;
4. 在 Next.js 应用中集成多个 Prisma 客户端
¥ Integrate multiple Prisma Clients in your Next.js app
修改应用代码,使其从两个数据库中获取数据。按如下方式更新 app/page.tsx 文件:
¥Modify your application code to fetch data from both databases. Update the app/page.tsx file as follows:
import { postDBPrismaClient } from "@/lib/post-prisma-client";
import { userDBPrismaClient } from "@/lib/user-prisma-client";

export default async function Home() {
  const user = await userDBPrismaClient.user.findFirst();
  const post = await postDBPrismaClient.post.findFirst();

  return (
    <main className="min-h-screen bg-gray-50 py-12">
      <div className="max-w-4xl mx-auto px-4">
        <header className="mb-12 text-center">
          <h1 className="text-5xl font-extrabold text-gray-900">Multi-DB Showcase</h1>
          <p className="mt-4 text-xl text-gray-600">
            Data fetched from two distinct databases.
          </p>
        </header>

        <section className="mb-8 bg-white shadow-md rounded-lg p-6">
          <h2 className="text-2xl font-semibold text-gray-800 border-b pb-2 mb-4">
            User Data
          </h2>
          <pre className="whitespace-pre-wrap text-sm text-gray-700">
            {user ? JSON.stringify(user, null, 2) : "No user data available."}
          </pre>
        </section>

        <section className="bg-white shadow-md rounded-lg p-6">
          <h2 className="text-2xl font-semibold text-gray-800 border-b pb-2 mb-4">
            Post Data
          </h2>
          <pre className="whitespace-pre-wrap text-sm text-gray-700">
            {post ? JSON.stringify(post, null, 2) : "No post data available."}
          </pre>
        </section>
      </div>
    </main>
  );
}
4.1.用数据填充数据库
¥4.1. Populate your databases with data
在单独的终端窗口中,打开两个 Prisma 工作室 实例,通过运行以下脚本将数据添加到数据库中:
¥In a separate terminal window, open two instances of Prisma Studio to add data to your databases by running the script:
npm run studio
这将打开两个浏览器窗口,一个在 http://localhost:5555,一个在 http://localhost:5556。导航到这些窗口,并将示例数据添加到两个数据库。
¥This will open up two browser windows, one in http://localhost:5555 and one in http://localhost:5556. Navigate to those windows and add sample data to both databases.
4.2.运行开发服务器
¥4.2. Run the development server
在启动开发服务器之前,请注意,如果你使用的是 Next.js v15.2.0,请不要使用 Turbopack,因为存在已知的 issue。通过更新你的 package.json 脚本,从你的开发脚本中移除 Turbopack:
¥Before starting the development server, note that if you are using Next.js v15.2.0, do not use Turbopack as there is a known issue. Remove Turbopack from your dev script by updating your package.json:
"script":{
    "dev": "next dev --turbopack",
    "dev": "next dev",
    "build": "next build",
    "start": "next start",
    "lint": "next lint",
    "postinstall": "npx prisma generate --schema ./prisma-user-database/schema.prisma && npx prisma generate --schema ./prisma-post-database/schema.prisma",
    "generate": "npx prisma generate --schema ./prisma-user-database/schema.prisma && npx prisma generate --schema ./prisma-post-database/schema.prisma",
    "migrate": "npx prisma migrate dev --schema ./prisma-user-database/schema.prisma && npx prisma migrate dev --schema ./prisma-post-database/schema.prisma",
    "deploy": "npx prisma migrate deploy --schema ./prisma-user-database/schema.prisma && npx prisma migrate deploy --schema ./prisma-post-database/schema.prisma",
    "studio": "npx prisma studio --schema ./prisma-user-database/schema.prisma --port 5555 & npx prisma studio --schema ./prisma-post-database/schema.prisma --port 5556"
}
在单独的终端窗口中,通过运行以下命令启动开发服务器:
¥In a separate terminal window, start the development server by running:
npm run dev
进入 http://localhost:3000 目录,查看 Next.js 应用显示来自两个数据库的数据:
¥Navigate to http://localhost:3000 to see your Next.js app display data from both databases:
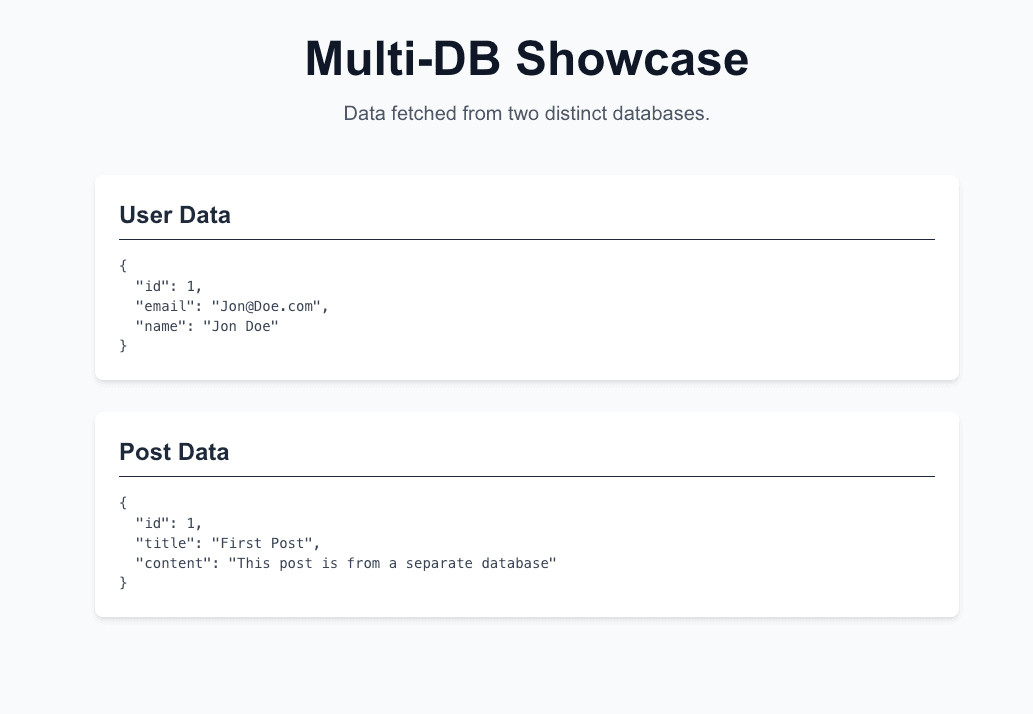
恭喜,你已经有一个 Next.js 应用正在运行,其中有两个 Prisma 客户端实例正在查询不同的数据库。
¥Congratulations, you have a Next.js app running with two Prisma Client instances querying different databases.
5. 使用多个数据库将你的 Next.js 应用部署到 Vercel
¥ Deploy your Next.js app using multiple databases to Vercel
按照以下步骤部署你的应用:
¥Deploy your app by following these steps:
-
确保你的项目已进行版本控制并已推送到 GitHub 存储库。如果你还没有存储库,在 GitHub 上创建一个。存储库准备就绪后,运行以下命令:
¥Ensure your project is version-controlled and pushed to a GitHub repository. If you do not have a repository yet, create one on GitHub. Once the repository is ready, run the following commands:
git add .
git commit -m "Initial commit with Prisma Postgres integration"
git branch -M main
git remote add origin https://github.com/<your-username>/<repository-name>.git
git push -u origin mainnote<your-username>and<repository-name>with your GitHub username and the name of your repository. :::替换 -
创建新项目。请遵循 Vercel 的 导入现有项目 指南,但在 步骤 3 处停止,你将在此处配置环境变量,然后单击“部署”。
¥Create a new project. Follow Vercel's Import an existing project guide, but stop at step 3 where you will configure environment variables before clicking Deploy.
-
配置
DATABASE_URL环境变量:¥Configure the
DATABASE_URLenvironment variable:-
展开“环境变量”部分。
¥Expand the Environment variables section.
-
添加
PPG_USER_DATABASE_URL环境变量:¥Add the
PPG_USER_DATABASE_URLenvironment variable:-
关键:
PPG_USER_DATABASE_URL¥Key:
PPG_USER_DATABASE_URL -
值:粘贴你的用户数据库连接 URL,例如,从项目中的
.env文件复制。¥Value: Paste your user database connection URL, e.g. by copying it from the
.envfile in your project.
-
-
添加
PPG_POST_DATABASE_URL环境变量:¥Add the
PPG_POST_DATABASE_URLenvironment variable:-
关键:
PPG_POST_DATABASE_URL¥Key:
PPG_POST_DATABASE_URL -
值:粘贴你的 post 数据库连接 URL,例如,从项目中的
.env文件复制。请勿在未设置环境变量的情况下进行部署。如果应用无法连接到数据库,你的部署将失败。:::¥Value: Paste your post database connection URL, e.g. by copying it from the
.envfile in your project.warningDo not deploy without setting the environment variables. Your deployment will fail if the application cannot connect to the databases.
-
-
-
点击“部署”按钮。Vercel 将构建你的项目并将其部署到实时 URL。
¥Click the Deploy button. Vercel will build your project and deploy it to a live URL.
打开 Vercel 提供的实时 URL,验证你的应用是否正常运行。
¥Open the live URL provided by Vercel and verify that your application is working.
恭喜!你已部署一个使用多个 Prisma 客户端查询两个不同数据库的应用,该应用现已在 Vercel 上上线并完全运行。
¥Congratulations! You have deployed an application that uses multiple Prisma Clients to query two different databases, and it is now live and fully operational on Vercel.
下一步
¥Next steps
在本指南中,你学习了如何在单个 Next.js 应用中通过 Prisma ORM 使用多个数据库:
¥In this guide, you learned how to use multiple databases using Prisma ORM in a single Next.js app by:
-
为用户数据库和帖子数据库设置单独的 Prisma 模式。
¥Setting up separate Prisma schemas for user and post databases.
-
配置自定义输出目录和环境变量。
¥Configuring custom output directories and environment variables.
-
创建辅助脚本以生成和迁移每个架构。
¥Creating helper scripts to generate and migrate each schema.
-
实例化并将多个 Prisma 客户端集成到你的应用中。
¥Instantiating and integrating multiple Prisma Clients into your application.
-
将你的多数据库应用部署到 Vercel。
¥Deploying your multi-database application to Vercel.
这种方法允许你保持数据模型的清晰分离,并简化多租户或多数据库场景。
¥This approach allows you to maintain a clear separation of data models and simplifies multi-tenant or multi-database scenarios.
为了进一步改进项目管理,请考虑使用 monorepo 设置。查看我们的相关指南:
¥For further improvements in managing your project, consider using a monorepo setup. Check out our related guides:
Stay connected with Prisma
Continue your Prisma journey by connecting with our active community. Stay informed, get involved, and collaborate with other developers:
- Follow us on X for announcements, live events and useful tips.
- Join our Discord to ask questions, talk to the community, and get active support through conversations.
- Subscribe on YouTube for tutorials, demos, and streams.
- Engage on GitHub by starring the repository, reporting issues, or contributing to an issue.